"" The Preppy Strawberry

Thursday, March 5, 2015

Project Life School Memories {Part 1}

**This post contains affiliate links **
PS 1

So what do you do with all of those stacks of school papers or school valentines each year?  Do you save them?  Or Do you toss them every time they come home?   I am known for saving the papers but not everything!!  I do weed out papers as they come home because if I didn’t you would really find me on the show hoarders! It Amazes me how much paper comes home from school each week! 

I’m not sure where I first heard about Project Life it might have been on Instagram  but I immediately fell in love with it!  I mean it took the hassle out of scrapbooking and it came with really cute Project Life kits!  I just love all the cute Project Life journaling cards! (another weakness and another aisle I must avoid when at the craft store!)  My love for scrapbooking and journaling goes all the way back to my high school days.  I still have the scrapbooks I made and I just recently came across a journal book that I kept in high school.   It’s so funny to read what we were doing on the weekends when I was in High School.  I will randomly snapshot pages and send to my friends and we laugh and sometimes we have no idea what it was about!  So When my daughter started school I knew I wanted to document her school days – especially the elementary school years!  I’m going to post this in Parts about how I am documenting Lilly’s elementary school days.  One great part of this project is that Lilly is helping me with this whole project! 

Part 1 – Class Valentines Day Cards
we are using the 12 X12 Project life Album, Project Life plastic pages, and the Tab dividers for each grade level.  We are using an album like this one this from Becky Higgins Kiwi Edition Designer Album

We are using the pocket pages by Becky Higgins Project Life  - I bought this variety pack to use
Becky Higgins Photo Pocket Pages - Big Variety Pack 1 (60 Pages)


PL2
After, I decide to use Project Life to document her Elementary School Days I decided why not include all of the cute Valentines!  I mean why not – I already had saved K-2 Valentine cards.  I just couldn't bring myself to throw them out!  They are really cute and I think they will be something fun to look back on as she gets older.

So all we are doing is sliding the cards into the slots in the Project Life plastic sheets.  Sometimes, we have to cut the cards or fold the cards to get them to fit or we trim them down to fit inside. 

PL3

We also include each year one of the Valentine’s Day cards that she passed out to her friends.  Pretty simple process and Project Life supplies make it so easy!  Each page, I have her write something about her class party and sign the card.  I love watching how her handwriting changes and something I want to make sure I save for her to see as she gets older. 
PL4

Part 2:   I will be sharing how I am documenting and saving the class work that comes home!

Thursday, February 26, 2015

Easy Crock pot Lasagna


image (5)

This crock pot lasagna recipe is so simple and easy to put together it will be one you will make again!  Ok, so in my house sometimes for dinner we all eat something different but there is only 3 of us so I guess I’m Ok with that even though I swore I would never be a cafeteria!  Part of the reason is my daughter is super picky and well even though she LOVES pasta she will not eat lasagna!  Then there is me, I’ve cut out pasta out of my diet and I’m learning how to clean eat and well this is a challenge in itself!  But my Husband loves lasagna and I’m always looking for easy dinners to have ready for him!  Plus, this also perfect for his lunches during the week!   I was a little hesitant as I put this together in the crock pot how this was going to turn out well I  can tell you it’s fantastic!!  It tastes just like you baked it in the oven!! 
Print Recipe
  • 1 lb Italian sausage
  • 2 jars (each 24 oz.) spaghetti sauce
  • 2 cups water
  • 1 lb. whole-milk ricotta cheese
  • 2 Tbs. chopped fresh flat-leaf parsley (optional)
  • salt and pepper to taste
  • 18 ruffle-edged lasagna noodles (not no-boil noodles)
  • 1 1/2 lb. mozzarella cheese, grated
  • 1/4 cup grated Parmesan cheese
Brown sausage breaking up any large chunks, until the meat is browned,  about 10 to 12 minutes. Add the spaghetti sauce and water and bring to a simmer.
In another bowl, stir together the ricotta, parsley, salt and pepper. Set aside.
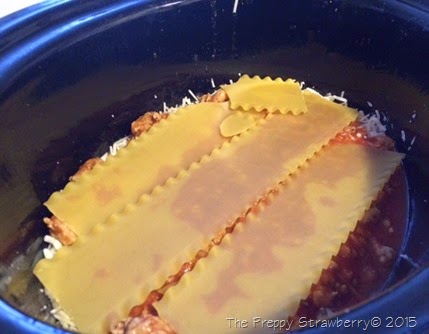
Spray inside of crock pot with cooking spray.  Spread a thin layer of the sauce on the bottom of the slow-cooker. Cover the sauce with a single layer of uncooked lasagna noodles (about 3), breaking the noodles as needed to fit. Spread about 1/3 cup of the ricotta mixture over the noodles. Top with about 2 cups of the sauce, then sprinkle with about 1 cup of the mozzarella and 1/4 cup of the Parmigiano-Reggiano. Repeat the layers 4 more times.
I found this recipe over at Skip to my Lou but I used homemade sauce instead of prepared jar sauce. 
Easy Crock Pot Lasagna {The Preppy Strawberry}
 
Cover and cook on low according to the manufacturer’s instructions until the noodles are tender and cooked through, about 4 hours.
 
Easy Crock Pot Lasagna {The Preppy Strawberry}


Easy Crock Pot Lasagna {The Preppy Strawberry}
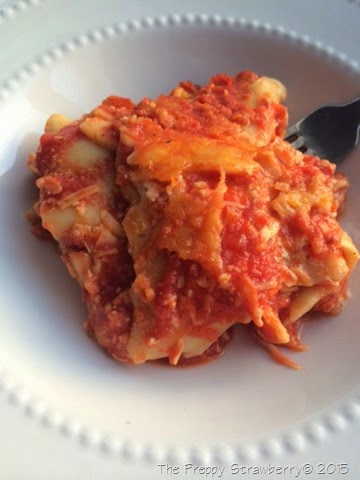
Turns out just like you baked it in the oven!  The cheese even gets brown on top – Yum! 
What are your favorite crock pot recipes? 


Monday, February 16, 2015

Soft Sugar Cookie Recipe

 
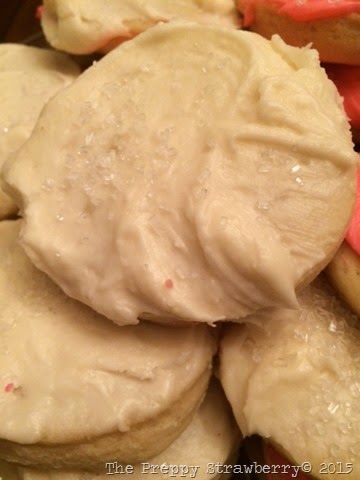
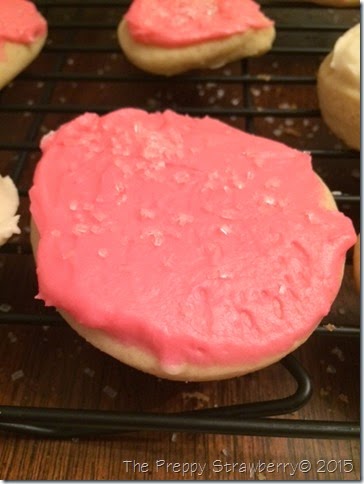
Sugar Cookie Recipe {The Preppy Strawberry}
 
Sugar Cookies are a favorite in my house so today I'm sharing with you my favorite sugar cookie recipe.   I’m not sure who originally passed along this recipe to me but it’s one that I’ve been making for years! 
The dough is perfect and so easy to work with especially when you are making cut out cookies!  
 
Sugar Cookie Recipe {The Preppy Strawberry}
 
PRINT RECIPE – Click here
 
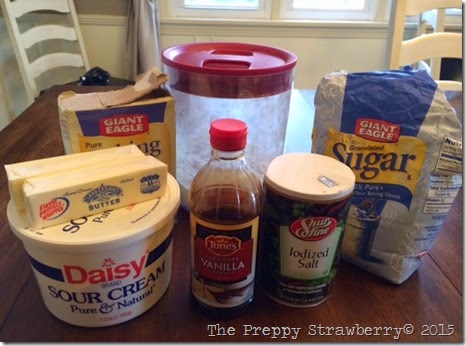
1 cup butter
2 cups sugar
2 eggs
3 tsp. vanilla
1 cup sour cream
1 tsp. salt
2 tsp. baking soda
5 1/2 cups flour
In mixer, cream butter and sugar, and then add eggs and vanilla.
Add sour cream. Combine salt, soda, and flour, and add to mixture.
 
Sugar Cookie Recipe {The Preppy Strawberry}
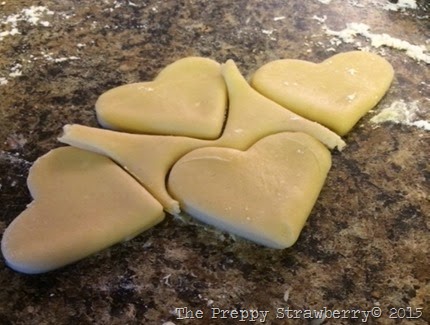
Roll dough out on floured surface to about 1/4 to 1/3 thick and then use a spatula to lift cookies onto greased (I used Pam) cookie sheets. Bake at 375 degrees for 7-8 min.  You will want to keep an eye on the cookies the cookies might look like they still need to cook but you do not want the edges to start browning. 
 
Let cookies cool on the cookie sheet for about 5 min and then move to the cooling racks. 
Cool cookies then frost
 
Sugar Cookie Recipe {The Preppy Strawberry}
Basic Butter cream frosting
1/2 cup butter softened
4 cups powdered sugar
2 tsp. vanilla extract or almond
1/4 cup milk
With a mixer cream butter. Beat in sugar and vanilla  Gradually add milk until frosting reaches desired consistency. Add desired food coloring.
 
 
Sugar Cookie Recipe {The Preppy Strawberry}


Saturday, January 10, 2015

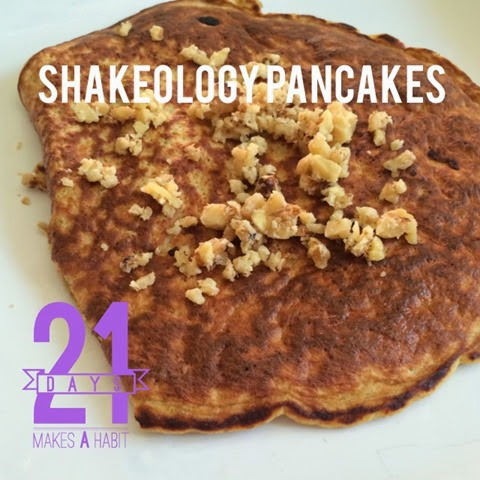
21 Day Fix Shakeology Pancakes

** This post contains affiliate links**
image (12)

If you follow me on instagram you already know that this morning I tried something new with Shakeology.    I used my vanilla Shakeology in a recipe and I made pancakes!  Yes, pancakes on the 21 day fix and they were SO GOOD!   I’m trying to try out new things so I do not get bored eating the same things over and over again! If you know what I mean ….  
Enjoy!!

PRINT RECIPE
Ingredients
4 Egg whites
1/2 scoop of Shakeology
1 tsp sweetener - i used splenda but you can use whatever you have on hand
1/2 tsp vanilla extract
Directions: 
Mix ingredients well

use non stick cooking spray on pan or griddle
flip pancakes after they begin to set - you will see bubbles start to form and this is good sign the pancake is ready to be flipped
top with a banana or natural nut butter.   I warmed a tsp of peanut butter and drizzled over mine
nuts - optional
1 1/2 RED
1 PURPLE (if you add banana)
1 BLUE (if you add nuts/ peanut butter)
1 tsp


Interested in where to buy shakeology?  click the image below for more information.  This link will take you to my beach body coach website.  *affiliate link**


Tuesday, January 6, 2015

21 Day Fix Slow Cooker Enchilada Soup

21 REV

If you are following me on instagram you will know that I’m following the 21 day fix a beachbody program.  21 Day Fix is a nutrition and fitness program that makes losing weight so simple, anyone can do it. Easy-to-follow portion control and 30-minute workouts take the guesswork out of losing weight to help you see results fast—up to 15 pounds in just 21 days!  I’m just in my first week but I’m trying to plan ahead easy meals that will keep me on track!  Tonight, I made slow cooker Chicken Enchilada Soup which is perfect for busy days! 
Enjoy!!

21 Day Fix Slow Cooker Enchilada Soup – PRINT
Ingredients
  • 2 tsp olive oil
  • ½ cup chopped onion
  • 2 garlic cloves, minced
  • 3 cups veggie broth
  • 1 8oz can tomato sauce
  • ⅛ cup cilantro (fresh or that fun stuff in a tube)
  • 1 15oz can no salt added black beans
  • 1 10oz can diced  Ro-Tel tomatoes & Green Chiles
  • 1 can corn
  • 1 tsp cumin
  • ½ tsp ground oregano
  • 3 medium chicken breasts
Instructions
  1. Heat olive oil over medium heat, add onion and garlic, stirring until soft, about 3 minutes.
  2. Add all ingredients to slow cooker.
  3. Cover and cook on low for 5 hours.
  4. Remove chicken strips from soup and shred,
  5. Return to slow cooker.


This recipe was adapted from http://potentially-lovely.com/21-day-fix-slow-cooker-enchilada-soup/ I made a few substitutes
21 Day Fix  {The Preppy Strawberry}
How does 21 Day Fix work?
With the 21 Day Fix container system, you’ll learn how to create healthy portions simply and intuitively.
It shows you how to eat whatever you want, in the right amounts, so you can reach your goals fast.
No guesswork, and no calorie counting!


Interested in joining the 21 day fix challenge?  For more information about 21 day fix and how to buy the challenge back click the image.  I am a beachbody coach and this link will take you to my beachbody website.  **affiliate link**


Friday, January 2, 2015

Hungarian Walnut Cookies ~ A Cookie Challenge

Hungarian Walnut Cookies {The Preppy Strawberry}


If you follow me on instagram you already know that my husband presented me with a cookie challenge back in November.  Thanksgiving weekend, I was making my Holiday to do list making sure we made time for holiday baking.  I asked him what cookies he wanted me to bake and by that I meant what cookies do you have to for Christmas.  You know those cookies that your grandma always made or you always had as kid that really just mean Christmas to you. So he tells me that he loved these cookies his German Grandma made when he was a kid.  I didn't have much to go on and he did not have a name for the cookie only what they looked like and what was in the cookie.  So off to Pinterest and Google I went and 15 min later I came back with several images that I pinned.  So after his review of what he felt was close to the cookie he was talking about I added the cookie to the holiday baking list. But before that happened he tagged his comment about the cookies with "You will never be able to make them"  hmm?  Did I just hear you right?  I will not be able to make them right?  Oh game on!  He pretty much just meant that I would never be able to duplicate his Grandmas exact cookie.   Well I kinda figured that since I did not have her exact recipe but I was going to try my hardest to come close.    Well, I came close ..... like lets say 99% close and I'll take that as a win!  

The cookies were a hit and will definitely be on the Holiday Cookie list next year!  

What Christmas cookies are always must haves in your house for the holidays?  

The recipe below is one I found on American Heritage Cooking and the only change I made was I used powdered sugar after the cookies came out of the oven.  


Authentic Hungarian Walnut Rolls
Yield: 64 Cookies
These traditional Hungarian cookies have a sweet, nutty filling inside a flakey, rich pastry! While they are traditionally made at Christmastime, they are outstanding any time of year!
Ingredients
    For the Pastry:
  • 2 ¼ cups all purpose flour
  • ½ teaspoon salt
  • 8 oz cream cheese, room temperature
  • 1 cup unsalted butter, softened
  • ½ cup granulated sugar for rolling
  • For the Walnut Filling:
  • ½ pound freshly ground walnuts (finely)
  • 1 cup sugar
  • ½ cup of boiled milk
  • 1/8 cup melted butter
Instructions
    To make the Walnut Filling:
  1. Mix filling in a medium bowl using only ¼ cup of the boiled milk. The mixture should be thick.
  2. If the filling is not spreadable, use the rest of the milk. I used all of it. It will thicken as it sits.
  3. Note: You can make the filling ahead of time and freeze it until you are ready to use it. Just thaw at room temperature when you are ready to use.
  4. For the Pastry Dough:
  5. Sift flour and salt together in a medium bowl and set aside.
  6. Beat the cream cheese and butter together with a stand mixer or a hand mixer until completely incorporated and creamy (3-5 minutes).
  7. Reduce the speed of the mixer and slowly add in the flour. I used 5 additions and completely mixed in the flour each time. The dough will be soft but not sticky.
  8. Divide the dough into 4 equal parts and flatten each to ¾” thick. Wrap in plastic wrap and refrigerate until hard, at least 2 hours.
  9. Assembling the Walnut Rolls:
  10. Pre-heat the oven to 375°. Move the oven rack one setting higher than the center.
  11. Take one of the disks of dough from the refrigerator and lightly flour both sides. Spread granulated sugar on your pastry board or work surface. Place the dough on top and roll out pastry to 1/16” thick or as thin as possible. Most recipes say 1/8” but my Husband remembered them being thinner. Thinner is better. If you roll them too thick, the bottom will burn before the inside has a chance to fully cook and puff up. They still taste good but they taste so much better when properly rolled. Promise. Just trust me here.
  12. With a pastry wheel or sharp knife, trim the dough into a square and then cut the square into 16 smaller squares. My dough never rolled out into a perfect circle so I would just cut as many 1 1/2 “ squares a possible, saving the scraps for later.
  13. Place a dollop of filling in one corner of each square. I used ½ teaspoon.
  14. Starting in the corner with the filling, roll the dough around the filling from corner to corner, gently pressing down as you roll. Grab the roll on both sides and pinch as you bend the roll to create a crescent shape. Gently move it to a parchment covered baking sheet, placing the Rolls no closer than 1” apart.
  15. Repeat with all remaining squares.
  16. Sprinkle the middles of the Rolls with just a touch of granulated sugar.
  17. Bake 12-14 minutes or until the bottom edges are a golden and you can smell them. They should puff up slightly in the middle. With experience you can see when the dough is cooked. Let cool slightly on the pan on a wire rack and then move them gently to a wire rack to cool completely.
  18. Repeat with all remaining dough. Refrigerate and re-roll your scraps. Amazing.
  19. For a more traditional cookie, you can omit the granulated sugar and dust the final, cooled cookie with powdered sugar. I will warn you that it won’t be as divine.

Sunday, December 28, 2014

Hot Foil Ham and Swiss Sandwiches


New Years is just a few days away and you will want to make these sandwiches!  They are so simple and perfect for feeding a crowd!  You can serve them as an appetizer or as part of the main course.  My grandma used to make these sandwiches and as a kid I never really cared for them but as an adult I love them!  They are something that I make every holiday season to keep on hand because they make for a quick and easy meal.  
After you wrap the sandwiches in foil they need to cook for about 20 min on 350 degrees.  The recipe makes about 16 sandwiches so whatever you do not plan on using you can freeze!  So these also can be made in advance and freeze until you are ready to use!! These sandwiches also make a great addition to  any party get together - so simple to make you will love them!  
1lb chipped chopped ham 
1 medium onion (chopped) 
1 stick butter (softened not melted)
2 full Tablespoons poppy seeds
4 level Tablespoons of prepared yellow mustard 
1  bag shredded swiss cheese 
hamburger buns or mini sliders - your choice

Mix all ingredients together.   Fill buns with mixture.  Wrap sandwiches in foil and cook for 20 min at 350 degrees.   If frozen bake 45 min but keep an eye on it after 30 min - oven temps may differ.